Are you looking to enhance the security of your WordPress admin area by limiting access?
If you have a small team, a practical approach is to restrict access solely to the IP addresses utilized by team members.
This tutorial will guide you through the process of restricting WordPress admin access by IP address.

What is the reason for restricting WordPress admin access by IP address?
If you operate a WordPress website, it is crucial to prioritize your website’s security. Although the WordPress core software is secure, there are additional measures you can take to safeguard your website from hackers.
Hackers can cause significant harm to your website, including taking it down, damaging your revenue and reputation, stealing data, and distributing malware to your website visitors, which can result in your domain being blacklisted by Google and other search engines.
One effective way to prevent hackers from accessing your WordPress admin area is by limiting unauthorized access.
If only you or a few trusted users require access to the admin area, a practical approach is to restrict access to wp-admin to your team’s IP addresses.
Each team member will connect to your website using a specific IP address for each location. By blocking access to all other IP addresses, even if a hacker has discovered your username and password, they will not be able to gain access to your website.
Instead, they will receive an error message stating, “Forbidden. You don’t have permission to access this resource.”
Let’s explore how to restrict WordPress admin access by IP address.
How to Limit WordPress Admin Access Based on IP Address
To Restrict WordPress Admin Access by IP Address, the first step is to create a list of IP addresses for all individuals who require access to your WordPress website. In case someone logs in from multiple locations, you will need to gather the IP address for each location.
They can determine their IP address by visiting a website such as SupportAlly.
After creating the list, you will need to modify a file on your website. You can use an FTP client or your hosting provider’s file manager app. If you are new to FTP, you can refer to our guide on how to use FTP to upload files to WordPress.
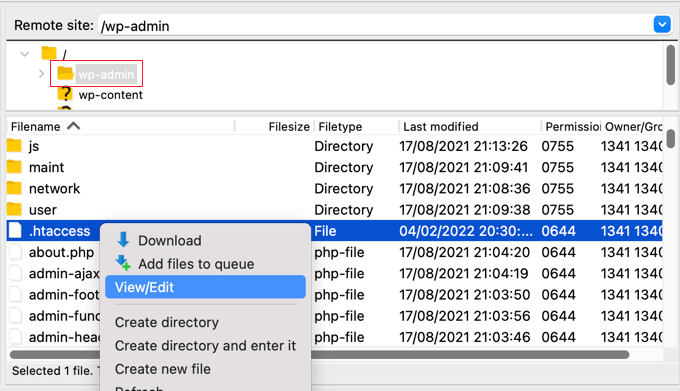
Using the software, navigate to your website’s /wp-admin/ folder. Once there, search for the .htaccess file. This file is hidden, so if you cannot locate it, you may need to enable the “show hidden files” option in your software.

In case the file is not present in the folder, it is recommended to create a new file and save it with the name .htaccess in the /wp-admin/ folder.
Caution: Avoid editing the root .htaccess file as it may result in blocking visitors from accessing the front end of your website! Ensure that you are editing /wp-admin/.htaccess.
It is advisable to download a copy of the file as a backup before making any changes. After that, you can proceed to edit .htaccess and insert the given code.
AuthUserFile /dev/null
AuthGroupFile /dev/null
AuthName “WordPress Admin Access Control”
AuthType Basic
<LIMIT GET>
order deny,allow
deny from all
# whitelist Syed’s IP address
allow from xx.xx.xx.xxx
# whitelist David’s IP address
allow from xx.xx.xx.xxx
# whitelist Amanda’s IP address
allow from xx.xx.xx.xxx
# whitelist Muhammad’s IP address
allow from xx.xx.xx.xxx
# whitelist Work IP address
allow from xx.xx.xx.xxx
</LIMIT>
Feel free to modify the file by replacing the names of your team members and inserting the IP addresses you gathered earlier in place of xx.xx.xx.xxx.
After saving the changes, only those specific IP addresses will have access to the WordPress admin area.
Keep in mind that if your IP address changes or you attempt to access your website from a different location, you may be denied entry to the WordPress admin section. In such cases, you will need to add your new IP address to the /wp-admin/.htaccess file.